
In the realm of heating and cooling systems, the efficient and versatile ductless mini-split system has gained recognition for its ability to provide both comfort and flexibility in various settings. From residential spaces to larger structures like warehouses, these systems offer a dependable solution. However, one question that frequently arises is, “How long does it take to install a ductless mini-split system?” This article aims to shed light on this topic, offering valuable insights into the installation process and the factors that contribute to its duration. By understanding the complexities involved, you can better prepare for the installation and ensure a smooth transition to your new mini-split system.
Factors that Affect Installation Time
Installing a ductless mini-split system involves several factors that can impact the overall installation time. By understanding these factors, you can better estimate the time it will take to complete the installation process. Let’s explore each factor in detail.
System Complexity
The complexity of the system itself plays a significant role in determining the installation time. Ductless mini-split systems come in different configurations, and some are more complex than others. Here are three common types of systems that can vary in complexity:
Single Zone System
A single zone system consists of one outdoor unit and one indoor unit. This type of system is relatively straightforward to install as it only requires connecting the refrigerant lines, electrical wiring, and mounting the units. The installation process for a single zone system typically takes less time compared to multi-zone systems.
Multi-Zone System
In contrast, a multi-zone system consists of multiple indoor units connected to one outdoor unit. This type of system allows for independent temperature control in each room or zone. The installation process for a multi-zone system involves more components and additional refrigerant lines. As a result, the installation time for a multi-zone system is generally longer.
VRF Systems
Variable Refrigerant Flow (VRF) systems are more advanced and complex compared to single and multi-zone systems. VRF systems can provide heating and cooling to multiple zones simultaneously, allowing for precise temperature control. The installation of VRF systems requires careful planning, extensive piping and wiring, and advanced technical knowledge. Consequently, the installation time for VRF systems is typically longer due to their complexity.
Number of Indoor Units
Another important factor that affects installation time is the number of indoor units involved in the system. The number of indoor units can vary depending on the size and requirements of the property. Let’s explore the implications of the system’s configuration on installation time:
Single Indoor Unit
If your installation only involves a single indoor unit, the process is typically straightforward. The installer will need to mount the indoor unit, connect the refrigerant lines and electrical wiring, and ensure proper insulation. The installation time for a single indoor unit is usually shorter compared to systems with multiple indoor units.
Multiple Indoor Units
In cases where multiple indoor units are required, the installation process becomes more involved. Each indoor unit needs to be mounted, connected to the outdoor unit via refrigerant lines, and connected to the electrical system. Additionally, proper zoning and balancing of the system may be necessary to ensure optimal performance. Consequently, systems with multiple indoor units tend to have a longer installation time compared to systems with a single indoor unit.
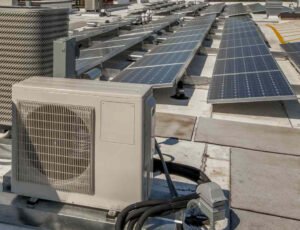
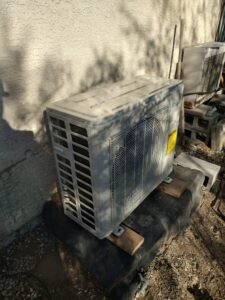
Number of Outdoor Units
The number of outdoor units is another factor that can affect the installation time. Depending on the requirements of the property and the desired capacity of the system, you may have either a single outdoor unit or multiple outdoor units. Let’s explore the implications of each scenario:
Single Outdoor Unit
A system with a single outdoor unit is generally simpler to install since all indoor units are connected to the same outdoor unit. The installation process involves mounting the outdoor unit, connecting the refrigerant lines and electrical wiring, and ensuring proper insulation. The installation time for systems with a single outdoor unit is typically shorter compared to systems with multiple outdoor units.
Multiple Outdoor Units
In cases where multiple outdoor units are required, the installation process becomes more complex. Each outdoor unit needs to be mounted, and the refrigerant lines and electrical wiring need to be properly connected. Additionally, coordination between multiple outdoor units may be necessary, especially in multi-zone installations. As a result, the installation time for systems with multiple outdoor units is generally longer than those with a single outdoor unit.
Accessibility
The accessibility of the installation site can greatly impact the installation time. Accessibility refers to how easily the installer can access the designated locations for the indoor and outdoor units. Let’s examine two different scenarios:
Easy Access
When the installation site has easy access, such as an open area or a location with minimal obstructions, the installation process is typically quicker. The installer can easily maneuver the equipment and components, which simplifies the overall installation. In such cases, the installation time is likely to be shorter.
Limited Access
In contrast, limited access to the installation site can pose challenges and prolong the installation process. This scenario may include tight spaces, narrow hallways, or hard-to-reach areas. The installer may need to take extra precautions, disassemble or reassemble components, or use specialized equipment to ensure the successful installation. Consequently, limited access can extend the installation time.

Electrical Wiring
The electrical wiring required for the installation is another factor that can influence the installation time. Depending on the existing electrical infrastructure and the specific needs of the system, the installation may involve either using the existing wiring or installing new electrical lines. Let’s explore both scenarios:
Existing Electrical Wiring
If the property already has the necessary electrical infrastructure in place, the installation process can proceed more smoothly. The installer will connect the indoor and outdoor units to the existing electrical system, ensuring proper grounding and compliance with electrical codes. This scenario typically reduces the installation time.
New Electrical Installation
In situations where new electrical wiring is required, the installation time may be extended. The installer will need to plan and run new electrical lines from the main electrical panel to the installation site. This process involves determining the appropriate wire size, installing conduits, and connecting the units to the newly installed electrical system. The complexity and length of the new electrical installation can impact the overall installation time.
Piping Length
The length of the refrigerant piping needed for the installation is another important factor that can affect the installation time. The refrigerant lines connect the outdoor unit to the indoor unit(s) and are responsible for transferring heat and cooling. The length of these lines can vary depending on the distance between the units. Let’s consider the implications of piping length:
Short Piping Length
If the distance between the indoor and outdoor units is relatively short, the installation process is typically faster. Short piping lengths require less time for measuring, cutting, and connecting the refrigerant lines. The shorter distance also reduces the chances of refrigerant leakage and minimizes potential issues related to refrigerant flow. Consequently, systems with short piping lengths can be installed more quickly.
Long Piping Length
In contrast, installations that involve long piping lengths require more time and effort. The installer needs to carefully determine the appropriate length, calculate refrigerant charge requirements, and ensure proper insulation. Additionally, longer piping lengths can increase the likelihood of refrigerant pressure drops and temperature fluctuations. Thus, systems with long piping lengths tend to have a longer installation time.
Type of Mounting
The type of mounting required for the indoor units is another factor to consider when estimating installation time. Different mounting options are available depending on the design and layout of the property. Let’s explore three common types of mounting:
Wall-Mounted
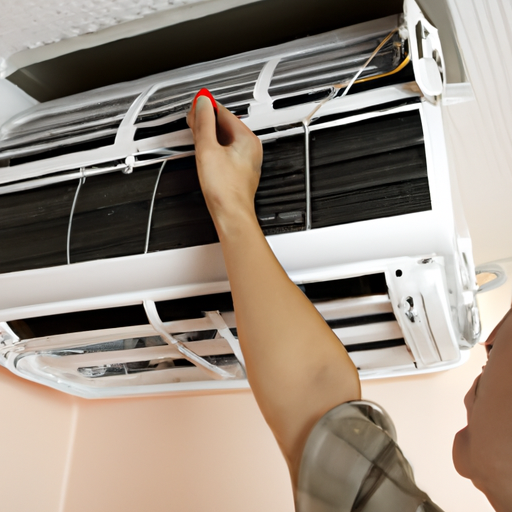
Wall-mounted indoor units are commonly used in residential and commercial applications. These units are mounted on the wall at an appropriate height, typically near the ceiling. Wall-mounted units are relatively easy to install, requiring proper anchoring, refrigerant line connection, and electrical connection. The installation time for wall-mounted units is usually shorter compared to other mounting options.
Ceiling-Mounted
Ceiling-mounted indoor units are installed on the ceiling, providing a more discrete appearance. These units are suitable for areas with limited wall space or aesthetic considerations. The installation process for ceiling-mounted units involves mounting the unit securely to the ceiling, routing the refrigerant and drain lines, and connecting the electrical wiring. Although ceiling-mounted units require more careful planning and additional steps, the installation time is generally comparable to wall-mounted units.
Floor-Mounted
Floor-mounted indoor units are designed to be installed close to the ground, providing heating and cooling near the floor level. These units are ideal for areas with limited wall or ceiling space, such as rooms with large windows or low ceilings. The installation process for floor-mounted units involves anchoring the unit securely to the floor, connecting the refrigerant and drain lines, and completing the electrical connection. Although floor-mounted units require additional steps for proper installation, the overall installation time is typically similar to other mounting options.
Additional Features
The presence of additional features in the ductless mini-split system can impact the installation time. These features go beyond the basic heating and cooling functions and enhance the system’s capabilities. Let’s explore some common additional features:
Heat Pump
A heat pump feature allows the system to provide both heating and cooling functions. Heat pump installation necessitates additional components and connections, such as reversing valves and defrost controls. The installation time for systems with a heat pump feature is slightly longer compared to systems without this feature.
Dehumidification
Ductless mini-split systems equipped with dehumidification capabilities are designed to remove excess moisture from the air. Depending on the specific dehumidification features, additional components may need to be installed, such as moisture sensors and drain systems. The presence of dehumidification features can slightly extend the installation time.
Air Purification
Air purification features in a ductless mini-split system help improve indoor air quality by eliminating pollutants and allergens. These features may require the installation of additional filters, UV germicidal lamps, or electronic air cleaners. The installation time for systems with air purification features may be slightly longer due to the additional components and connections involved.
Smart Controls
Smart control features allow users to control the ductless mini-split system remotely using mobile devices or home automation systems. The installation process for smart controls includes configuring the system for wireless communication, connecting the control devices, and ensuring compatibility with the user’s preferred interface. The presence of smart control features may extend the installation time slightly due to the additional setup and configuration.

Existing HVAC System
If there is an existing HVAC (Heating, Ventilation, and Air Conditioning) system in the property, it can affect the installation time of the ductless mini-split system. Here are two scenarios to consider:
Replacing an Existing HVAC System
If the new ductless mini-split system is replacing an existing HVAC system, the installation process may be more straightforward and less time-consuming. The installer can utilize existing electrical wiring, ductwork modifications, and other infrastructure that may already be in place. However, some adjustments or modifications may still be necessary to ensure compatibility and optimize performance.
Installing Alongside an Existing HVAC System
When installing a ductless mini-split system alongside an existing HVAC system, the installation time may be longer. The installer needs to carefully plan the integration of the two systems, including coordinating electrical connections, refrigerant lines, and control compatibility. Additionally, proper zoning and balancing of the combined systems may be required to optimize performance and energy efficiency.
Experience of Installer
The experience and expertise of the installer also play a crucial role in determining the installation time. A professional installer with extensive knowledge and experience in ductless mini-split systems will be familiar with the necessary procedures and best practices. They can navigate potential challenges more efficiently, resulting in a faster installation process.
On the other hand, a do-it-yourself (DIY) installation, while potentially cost-saving, may take longer if you are not familiar with the intricacies of the system. DIY installations often involve a learning curve, requiring additional time for research, planning, and troubleshooting. If you opt for a DIY installation, allocate sufficient time to acquire the necessary knowledge and skills beforehand. Keep in mind that professional installation is often recommended to ensure proper and efficient operation of the system.
In conclusion, several factors contribute to the overall installation time of a ductless mini-split system. Factors such as system complexity, the number of indoor and outdoor units, accessibility, electrical wiring, piping length, type of mounting, additional features, existing HVAC systems, and the experience of the installer all play a role in determining the time required for installation. By carefully considering these factors, you can estimate the installation time more accurately and plan accordingly for a successful ductless mini-split installation in your property.
