
?Are you looking for a reliable, flexible, and cost-effective way to mount equipment, pipework, cable trays, or solar racking in your next project?
Slotted Channel Mounting Solutions
Slotted channel mounting solutions are one of the most versatile systems you can use for structural support and equipment installation. You’ll find them in buildings, industrial facilities, renewable energy installations, and many mechanical and electrical applications because they keep installation adaptable and straightforward.
What is a slotted channel?
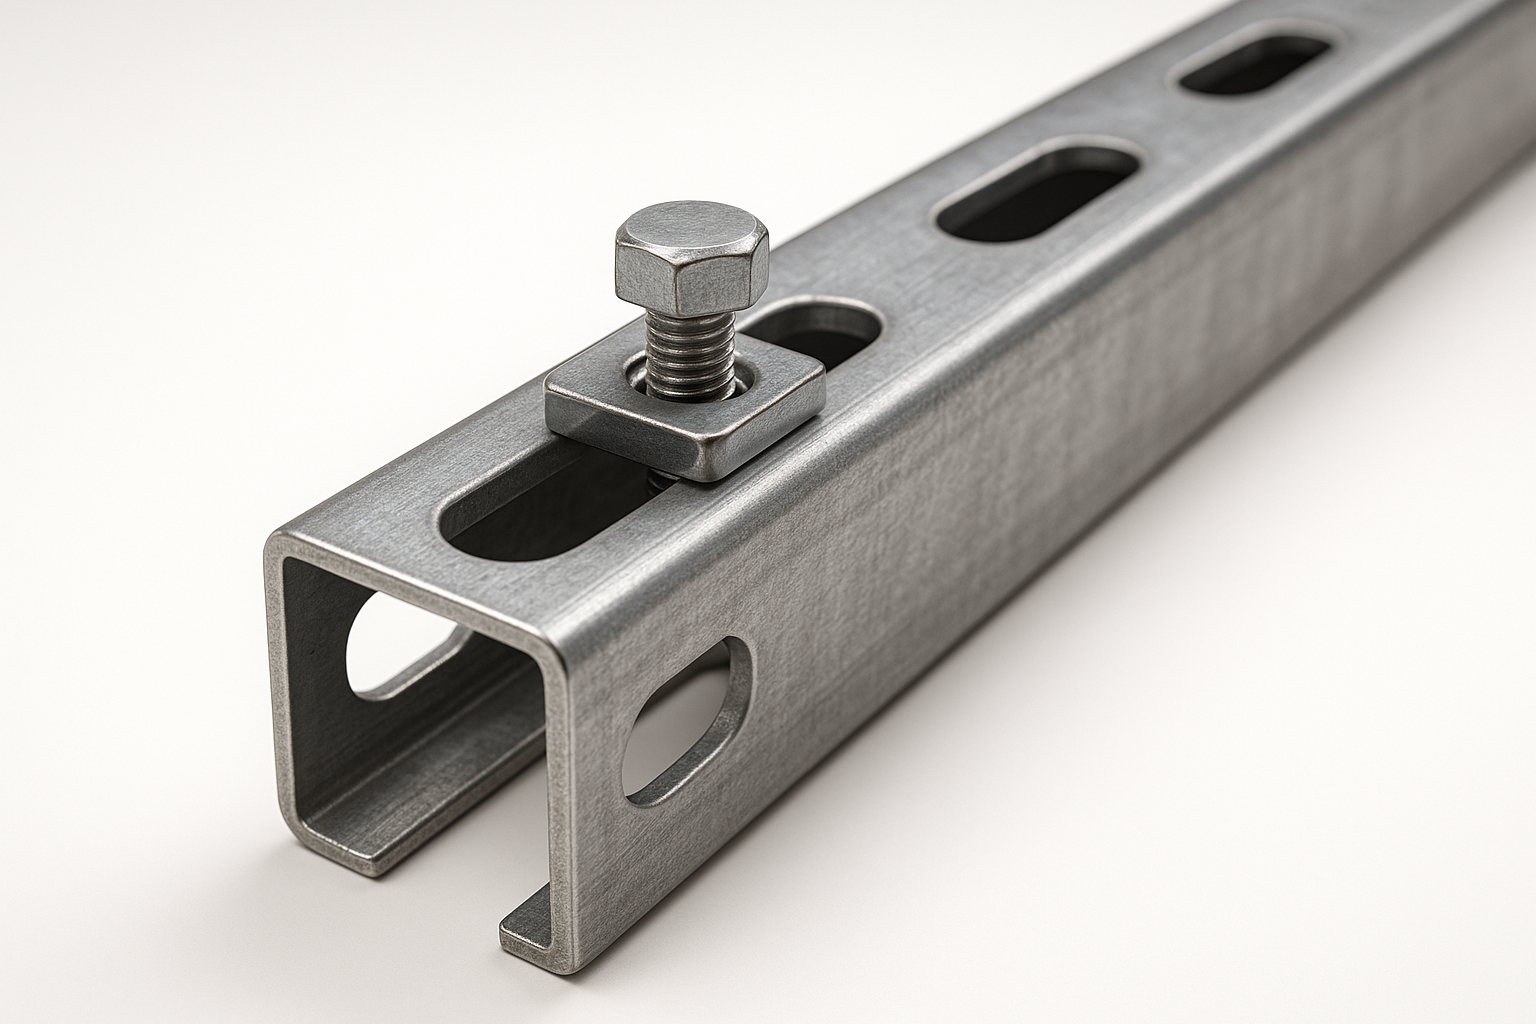
A slotted channel is a length of metal (usually steel, stainless steel, or aluminum) that has regularly spaced slots or holes along its length. You use matched fasteners—channel nuts, bolts, brackets—to assemble frames, supports, or rails without welding. This makes the system modular and adjustable, so you can reposition components easily after initial installation.
Key components of a slotted channel system
You’ll typically deal with these basic parts: the channel itself, channel nuts or spring nuts, bolts and washers, connecting brackets or plates, end caps, and accessories like clamps or anchors. Each component plays a role in creating a secure, adjustable mounting system that fits your project needs.
Why choose slotted channel systems?
You’ll find several practical advantages when you use slotted channel systems. They allow quick on-site adjustments, reduce downtime for changes, and often cut labor costs because you don’t need welding or custom fabrication. Their modular nature means you can reuse components across different projects.
Flexibility and adjustability
Because the slots allow fasteners to be repositioned anywhere along the length, you can change mounting locations, angles, and spacing without dismantling the entire system. If your design evolves or if you need to add equipment later, the channel system makes changes manageable.
Speed of installation
You’ll typically install channel systems faster than welded supports or bespoke fabricated frames, especially when combined with pre-punched channels and standardized hardware. This translates into shorter project timelines and reduced labor hours.
The 21mm slotted channel: Overview
The 21mm slotted channel is one of the common light-duty channel sizes you’ll encounter. It’s valued for compactness, light weight, and suitability for smaller loads or tighter installation spaces where a wider channel would be excessive. If you need a neat, unobtrusive support that still offers adjustability, this channel can be a good fit.
Typical uses for 21mm channel
You’ll often use 21mm slotted channel for cable management, light conduit supports, small signage, lighting fixtures, sensor mounts, and single-pipe support. It’s commonly chosen where mounting depth is limited or where aesthetic considerations favor a smaller profile.
Materials and finishes available
You can get 21mm channel in multiple materials: pre-galvanized mild steel, hot-dip galvanized steel, stainless steel (typically 304 or 316), and aluminum. Finishes can include zinc electroplate, hot-dip galvanizing, and powder coating for color or extra corrosion protection.
Common sizes and how 21mm compares
Below is a table summarizing common slotted channel profiles and how the 21mm channel relates to other popular sizes. Use this table to see which channel best matches space, load, and aesthetic needs.
| Channel Profile | Internal Width* | Typical Slot Size | Material Options | Typical Applications |
|---|---|---|---|---|
| 21mm slotted channel | 21 mm | 6–8 mm × 25–32 mm | Steel, stainless, aluminum | Light supports, cable runs, small fixtures |
| 41mm slotted channel | 41 mm | 9–11 mm × 28–35 mm | Steel, stainless | Medium-duty supports, pipe clips, heavier trays |
| 41 × 41 (square) channel | 41 mm | Various | Steel, stainless | Heavy-duty frames, structural support |
| 41 × 25 channel | 25–41 mm | Various | Steel, stainless | Versatile medium-duty applications |
*Internal width numbers are indicative of commonly available products; verify manufacturer dimensions for exact fits.
Selecting the right channel for your project
Choosing the correct slotted channel involves more than just matching outer dimensions. You’ll need to account for load, span, environment, mounting surface, and compatibility with fasteners and accessories.
Assess your loads and spans
You should identify the type of loads (point loads, uniformly distributed loads, cantilever loads) and the effective span between supports. Light loads over short spans are perfectly handled by a 21mm channel, while greater loads or longer spans often require a wider/heavier channel or additional supports.
Environmental conditions and corrosion resistance
Consider whether the installation is indoor, outdoor, corrosive (chemical plants, coastal areas), or hygienic (food processing). For corrosive or outdoor environments, stainless steel or hot-dip galvanized finishes are preferable. For indoor, dry areas, zinc-plated or powder-coated steel may be sufficient.
Compatibility with fasteners and accessories
Make sure the channel’s slot size and shape work with available channel nuts, spring nuts, or special fasteners. You’ll want compatible bolts, washers, clamps, and mounting brackets. If you plan to retrofit equipment, verify that the fastener sizes match the equipment’s mounting holes.
Hardware and accessories explained
Good quality accessories make your channel system reliable and fast to assemble. You’ll find dedicated nuts, fixing plates, brackets, clamps, and joiners designed to fit the channel profile precisely.
Channel nuts vs. spring nuts
Channel nuts are square or slotted nuts that sit in the channel and accept a bolt; they require positioning and sometimes twisting to lock in. Spring nuts include a spring to hold the nut in position inside the channel so you can assemble components single-handedly. You’ll choose spring nuts for speed and convenience, and standard channel nuts if you prefer a lower-cost option.
Brackets, joining plates, and end caps
You’ll use brackets to make rigid joins or corners, joining plates to connect channel lengths end-to-end, and end caps to give a finished appearance and keep debris out. Many specialty brackets (adjustable angles, cantilever supports) are available to match specific mounting situations.
Anchors and substrate fixings
When securing the channel to walls, ceilings, or concrete, pick anchors sized for the substrate and anticipated load. Use expansion anchors or chemical anchors for concrete, toggle bolts for hollow walls, and lag bolts for timber. The right anchor increases load capacity and reduces vibration issues.
Installation best practices
A consistent process saves time and avoids rework. Prepare, measure, cut, deburr, and assemble methodically, and verify alignment and load paths as you go.
Preparation and layout
You’ll start by drawing a layout that shows channel runs, support points, and anchor locations. Mark mounting points on your surface, checking for obstructions such as ducts or structural elements. Confirm that the channel length and orientation meet clearance and aesthetic requirements.
Cutting and edge treatment
Use a chop saw with an abrasive blade or a hacksaw for small jobs; cut channels square at the ends. After cutting, always deburr sharp edges and remove weld spatter or scale. This reduces the risk of injuries and ensures close-fitting joints.
Anchoring and spacing
Place anchors at recommended intervals based on the load and channel size. For a 21mm channel with light loads, anchors may be spaced up to about 600–1000 mm depending on load type and substrate—always consult manufacturer load tables. For heavier loads or cantilevered installations, reduce spacing and increase the number of supports.
Tightening and torque guidance
You’ll want consistent bolt torque to avoid loose joints or overstressed fasteners. Typical bolt torque ranges (approximate) are:
- M6: 8–12 Nm
- M8: 20–30 Nm
- M10: 35–50 Nm These are general guidelines; confirm with bolt manufacturer and application requirements.
Structural considerations and load calculation
You’ll need to ensure that the channel, fasteners, and anchors together resist applied loads with an acceptable safety margin.
Understanding load types
Different loads behave differently. A point load on a channel produces bending at the nearest support, while a uniformly distributed load spreads across the span. Cantilevered loads create bending moments at the fixed end. Identify the worst-case scenario in your design and design for that.
Deflection limits and serviceability
Excessive deflection can cause damage or misalignment even if the channel remains below its ultimate strength. Designers often use deflection criteria like L/200 or L/360 (span divided by allowable deflection) depending on the application. For sensitive equipment, choose stricter limits.
Safety factors and design codes
Design codes and industry standards often require safety factors based on the load type and application. You should consult relevant local codes, industry standards, or an engineer for critical installations. For smaller, non-critical installations, follow manufacturer data and conservative safety margins.
Corrosion protection and material choice
Choosing the right material and finish will affect maintenance needs and longevity of your installation.
Material comparison
- Steel (zinc-plated): Cost-effective and suitable for indoor use; limited outdoor life unless further protected.
- Hot-dip galvanized steel: Good outdoor resistance; recommended for most exterior installations.
- Stainless steel (304): Excellent corrosion resistance for many environments; 316 is better for highly corrosive or marine environments.
- Aluminum: Lightweight and corrosion-resistant, but lower strength; suitable for light-duty and where weight matters.
Coatings and longevity
Hot-dip galvanizing provides substantial protection in many outdoor settings; powder coating offers an aesthetic finish plus extra corrosion resistance if applied over a suitable base. In highly corrosive environments, stainless steel is often the most durable option.
Comparing 21mm channel to larger channels
You’ll need to weigh size, capacity, and space constraints when selecting a channel profile.
| Feature | 21mm Channel | 41mm Channel |
|---|---|---|
| Profile size | Slim, compact | Larger, sturdier |
| Typical duty | Light-duty | Medium to heavy-duty |
| Weight | Lower | Higher |
| Space required | Minimal | More space needed |
| Cost (material) | Lower | Higher |
| Typical fastener compatibility | M6–M8 | M8–M10 and larger |
| Best used for | Small fixtures, cable support | Pipe racks, heavier trays, structural frames |
You’ll choose a 21mm channel when low profile and light-duty capacity meet your needs. If you expect higher loads or long spans, a 41mm or larger channel often reduces the number of supports required, which can lower installation complexity even though the material cost is higher.
Customization and prefabrication options
You can get channels cut, slotted, or punched to length before delivery to save on-site labor. Manufacturers often offer pre-assembled frames or kits tailored to your project.
Pre-punched and pre-cut channels
Ordering pre-cut and pre-punched channels ensures accurate hole placement and reduces on-site fabrication. This helps maintain alignment and speeds installation.
Pre-assembled frames and kits
For repetitive installations such as rack systems or solar arrays, you can order pre-assembled subassemblies or kits that include channels, nuts, bolts, clamps, and instructions. Kits reduce errors and speed deployment.
Maintenance and troubleshooting
Regular inspection and maintenance will extend service life and prevent failures that could cause downtime or safety issues.
Inspection checklist
You should check for loose bolts, deformed channels, corrosion, and damaged finishes on a periodic schedule. Verify that anchors remain secure and that no unexpected loads have been added.
Common issues and fixes
- Loose fasteners: Re-torque to recommended values and use thread-locking compounds if vibration is present.
- Corrosion: Repair or replace affected parts; consider upgrading the material or finish.
- Misalignment: Loosen and reposition channels or supports; consider adding stiffeners if movement recurs.
Safety considerations
Safety starts with proper design and continues through installation and maintenance. Don’t overlook load paths, fall protection during installation, and compatibility of components.
Personal protective equipment and handling
You should use proper PPE—gloves, eye protection, and cut-resistant sleeves—when cutting or handling channels. Use safe lifting techniques for longer or stacked channels to avoid injury.
Locking and fall prevention
For overhead installations, use locking nuts, safety cables, or secondary restraints where components could fall and injure personnel below. Check local regulations for any requirements related to overhead suspensions.
Standards, certifications, and documentation
You should request manufacturer data sheets, load tables, and compliance certificates. Many suppliers will provide technical documents showing allowable loads, finish specifications, and material grades.
Relevant standards to check
Look for product conformity with national or international standards (EN, DIN, ISO, BS) and verify materials against recognized grades (e.g., stainless steel 304/316). If your project requires seismic or wind resistance, consult local building codes and a structural engineer.
Cost considerations and lifecycle
You’ll weigh upfront material cost against installation speed, maintenance, and durability. Smaller channels like 21mm cost less in material but may require more supports; larger channels cost more but can reduce labor and maintenance in some cases.
Life-cycle thinking
When you consider a product’s lifetime cost, weigh corrosion resistance, frequency of maintenance, the cost of potential downtime, and the ability to reuse components in future projects. Sometimes spending more on stainless or galvanizing lowers total cost over years.
Frequently asked questions (FAQ)
Below are answers to common questions you may have while planning a slotted channel solution.
Q: Will a 21mm channel handle a heavy piece of equipment? A: Typically, 21mm channels are best for light-duty loads. For heavy equipment you’ll likely need a wider or stronger channel and additional supports. Always check the manufacturer’s load tables or consult a structural engineer.
Q: Can I use channel systems outdoors? A: Yes—choose materials and coatings suited to the environment such as hot-dip galvanizing or stainless steel for outdoor or corrosive environments.
Q: How do I join two channel lengths? A: You can join channels with butt plates, overlap joints with joining plates, or use specialized end connectors. Pre-punched channels make alignment easier.
Q: Are spring nuts necessary? A: Spring nuts are optional but offer installation speed and convenience since they stay in place while you position components.
Q: What maintenance is required? A: Periodic inspections for loose fasteners, corrosion, and deformation are recommended. Re-torque bolts as needed and replace damaged elements.
Final recommendations for your project
You should start by defining loads, span lengths, environment, and attachment surfaces. If your application is light-duty with limited space, the 21mm slotted channel is often a strong candidate. For heavier loads, consider a larger profile or additional supports. Always review manufacturer technical data and, for critical systems, consult a structural engineer to confirm that your chosen configuration meets safety and serviceability requirements.
If you want, you can provide specifics about your project—loads, span, environment, and what you plan to mount—and you’ll receive tailored recommendations on channel size, material, and a suggested hardware list.