
?Are you trying to design a frame, shelving, or support system using a 41×41 slotted channel and need a practical, step-by-step guide?
Design Guide for 41×41 Slotted Channel
This guide walks you through everything you need to design with 41×41 slotted channel. You’ll find clear explanations of dimensions, materials, installation techniques, load considerations, accessories, and common mistakes so you can make confident choices for your project.
What is a 41×41 Slotted Channel?
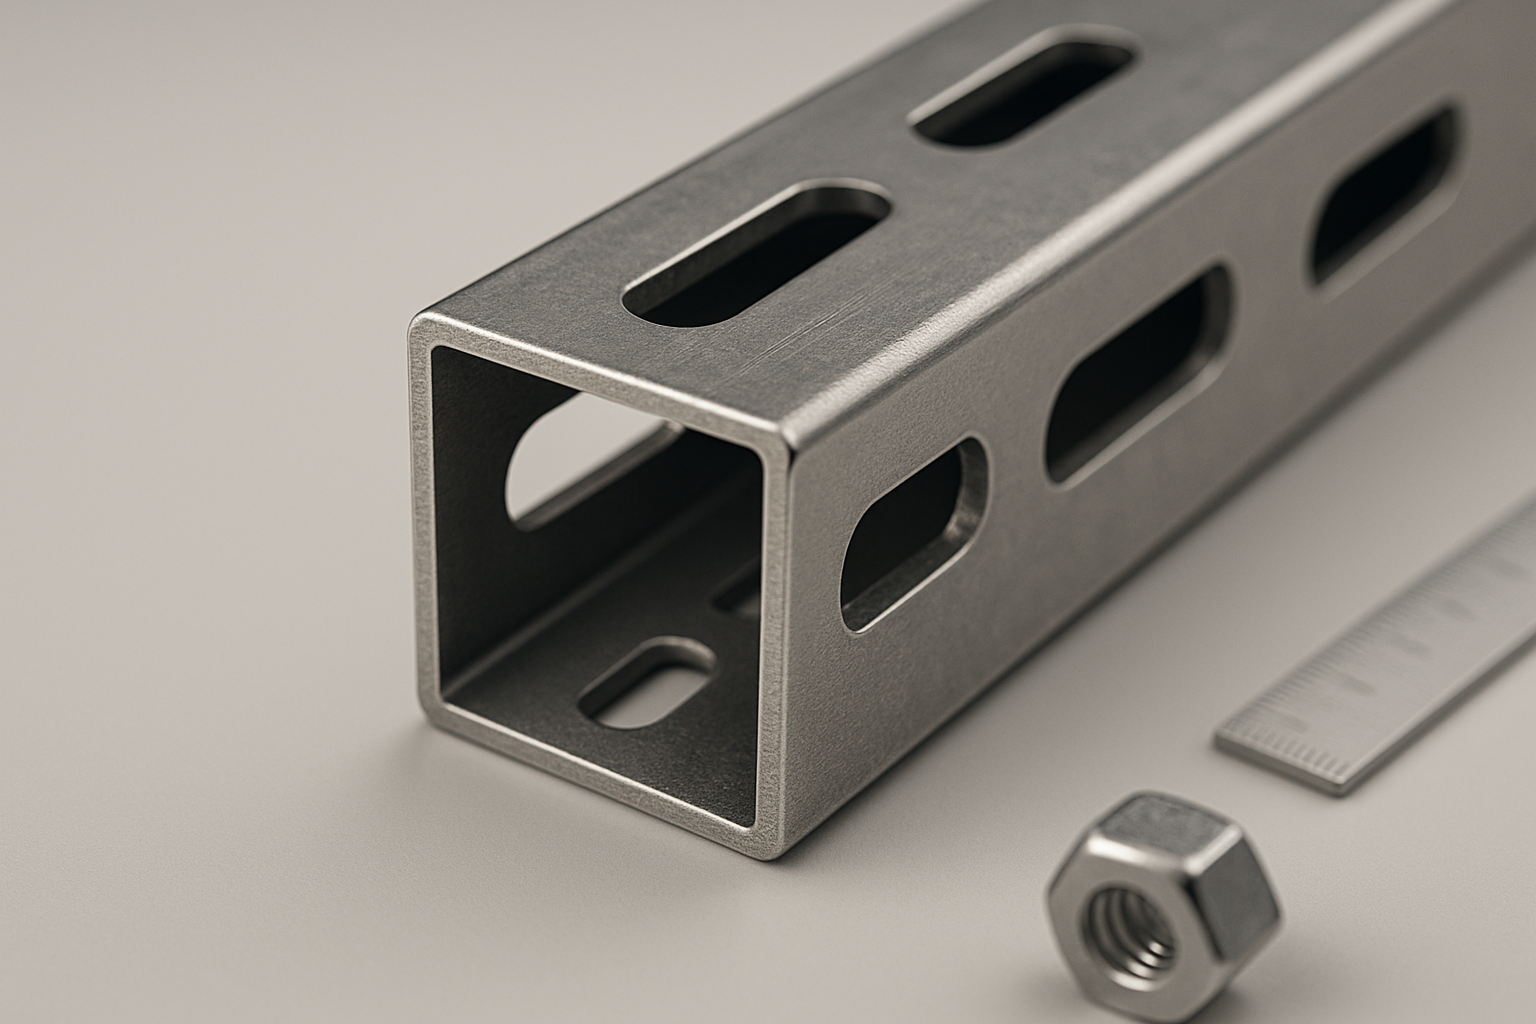
You’ll want to start by understanding what the product is. A 41×41 slotted channel is a square-section channel with 41 mm external dimensions on each side and a pattern of slots along its length to facilitate adjustable connections.
This channel is commonly used in modular framing, racking, conveyor supports, and industrial enclosures because the slots let you fasten components at variable positions without drilling.
Typical Applications
Knowing where this channel works best helps you choose it correctly. You’ll see it used in machine guarding, light-duty structural frames, cable management supports, and adjustable shelving.
Because of its versatility, the 41×41 size is a popular compromise between compactness and load capacity for small to medium systems.
Standard Dimensions and Slot Patterns
Understanding the exact geometry is crucial for compatibility with fasteners and accessories. The 41×41 designation refers to the external width and height of the channel in millimeters. Internal dimensions, wall thickness, slot size, and slot pitch vary by manufacturer.
Below is a table of commonly found nominal values to help you match components. Always confirm exact dimensions with your supplier’s datasheet before finalizing designs.
| Feature | Typical Value (nominal) | Notes |
|---|---|---|
| External cross-section | 41 mm x 41 mm | Square profile |
| Wall thickness | 1.5–3.0 mm | Varies by strength grade |
| Slot length | 10–20 mm | Common: 13 mm |
| Slot width | 6–9 mm | Typical: 8 mm |
| Slot pitch (center-to-center) | 25–50 mm | Often 50 mm |
| Slot orientation | Along one or more faces | Many channels have slots on two or opposite faces |
| Standard lengths | 1 m, 2 m, 3 m | Can be cut to length |
Materials and Finishes
Choosing the right material affects strength, weight, and corrosion resistance. You’ll typically encounter the following options:
- Mild steel (cold-rolled or hot-rolled): Cost-effective, good strength, requires a protective finish.
- Stainless steel (304, 316): Corrosion-resistant, suited for wet or chemical environments, higher cost.
- Aluminum (6061, 6063): Lightweight and corrosion-resistant, but lower strength than steel.
Finishes influence durability and appearance. Common finishes include:
- Zinc electroplating: Good general corrosion protection for indoor use.
- Hot-dip galvanizing: Offers thicker coating and better outdoor durability.
- Powder coating: Aesthetic finish plus protection, but can hide fittings and reduce slot tolerance if too thick.
- Anodizing (for aluminum): Improved corrosion resistance and color options.
Choose material and finish according to environmental conditions, permissible deflection, budget, and lifespan expectations.
Mechanical Properties and Strength Considerations
You’ll need to match mechanical performance to application demands. Tensile strength, yield strength, and section modulus control how the channel behaves under load.
Key concepts to consider:
- Bending strength: Dependent on section modulus and material strength. The square cross-section gives moderate section modulus for its size.
- Buckling: For long unsupported members, consider Euler buckling. Use the effective length and moment of inertia for calculations.
- Shear and bearing: Fastener-bearing capacity in slotted areas is reduced compared with full web.
- Fatigue: Repeated loads require attention to stress concentrations around slots and attachment points.
When sizing, pick a safety factor appropriate for application criticality (common range: 1.5–3 for static loads; higher for life-safety applications).
Slot Type, Orientation, and Effects on Strength
The slot pattern determines adjustability but also affects local strength. You’ll want to choose the right slot type:
- Standard elongated slots: Offer flexibility for bolt placement, common in modular systems.
- Keyhole slots: Faster installation for certain accessories, but with reduced bearing area.
- Multiple faces slotted: More flexibility but reduced torsional stiffness if many faces are perforated.
Slots create stress concentrations that reduce cross-sectional area. When you place heavy loads near or across slots, calculate reduced section properties or reinforce the area with backing plates or inserts.
Fasteners, Nuts, and Connectors
You’ll rely on common fasteners to make connections. Compatibility with slot dimensions and channel interior is crucial. Typical hardware:
- Hex bolts and regular nuts: Common, but if the bolt head or nut can’t seat inside the channel, use washers or captive nuts.
- T-slot nuts or sliding channel nuts: Designed to fit inside the channel and engage under the slot for a captive connection.
- Spring nuts: Provide quick positioning; they clip into the channel for one-handed assembly.
- Self-tapping screws: Useful for thin sheet attachments; avoid if repeated adjustments are needed.
- Rivets and blind rivets: For permanent joints, but not adjustable.
- Brackets and joining plates: L-shaped, T-shaped, splice plates to form frames.
Match bolt grade and size to load requirements. The table below gives typical bolt choices for common slot widths:
| Slot width | Recommended bolt size | Common nut type |
|---|---|---|
| ~6 mm | M6 | T-slot nut / hex nut |
| ~8 mm | M8 | T-slot nut / captive nut |
| ~10 mm | M10 | T-slot nut / captive nut |
Always check clearance for bolt heads and washers relative to slot geometry.
Designing Connections and Joint Types
You’ll select connection methods depending on adjustability, strength, and profile cleanliness.
- Butt splice: Two channel ends overlapped with a splice plate and bolts. Easy and economical.
- Corner joint with L-bracket: Standard for frames; use gusset plates for higher rigidity.
- Welded joints: Permanent and strong but eliminate future adjustability and require post-finish.
- Internal joining using insert plates: Insert plates inside the channel to create clean external appearance and improved bending resistance.
- End plates and flanges: For mounting to structures or other profiles.
When assembling, ensure bolt patterns distribute load evenly and avoid concentrating stress adjacent to multiple slots.
Structural Design: Sizing for Loads and Span
To determine whether a 41×41 channel is adequate, you’ll perform basic structural checks: bending, deflection, shear, and buckling.
General steps:
- Estimate load type: point loads, distributed loads, or combined.
- Define support conditions: simply supported, fixed, cantilever.
- Calculate bending moment and shear for worst-case load.
- Use section properties (moment of inertia I, section modulus S) for bending stress: sigma = M / S.
- Check deflection with appropriate formulas; keep deflection limits acceptable for function (e.g., L/240 for shelves, tighter for precision supports).
- For long slender members, calculate critical buckling load: Pcr = (pi^2 * E * I) / (K*L)^2 where K is effective length factor.
If you need, add stiffeners, shorter spans, or use channels in pairs to increase capacity.
Example calculation (simple beam)
You can run a quick example to get a feel for numbers. Suppose you have a simply supported 1.5 m span of 41×41 channel carrying a uniform load of 200 N/m. With known section inertia and material modulus, you’d compute max bending moment, stress, and deflection.
Because manufacturers vary in section properties, substitute exact I and S values from the datasheet to calculate bending stress and deflection. If the computed stress approaches the allowable stress for your material (e.g., 0.6*yield for steel for static loads), you’ll need to redesign.
Tolerances and Manufacturing Considerations
You’ll want to know acceptable tolerances so parts fit properly. Typical considerations:
- Slot dimensions tolerance ±0.5 mm (varies by process).
- Straightness and camber for long lengths — important when multiple channels join.
- Perpendicularity of ends for clean mating.
- Surface finish variability when painted or powder coated; coating thickness reduces slot clearances slightly.
Specify tight tolerances only where necessary to avoid unnecessary cost.
Modularity and System Integration
If you plan to combine the channel with other modular system parts, check compatibility for:
- Slot pitch and pattern (so accessories line up).
- Nut style and size.
- External dimension consistency for shared fittings or corner brackets.
Using a consistent system family saves time and reduces the need for custom parts.
Accessories and Complementary Components
You’ll often use accessories to complete your assembly. Typical items include:
- Corner brackets and joining plates in multiple angles.
- End caps to protect edges and improve appearance.
- Mounting feet or leveling pads.
- Shelves and panels that attach via brackets or sliding nuts.
- Cable management clips, clamps, and wire trays.
- Casters and wheels for mobile frames.
Make a list of required accessories early to ensure compatibility and reduce downtime.
Fabrication: Cutting, Drilling and Joining
You’ll likely need to modify channel lengths for your project. Best practices:
- Use cold saws, band saws, or abrasive cut-off saws for clean cuts.
- Deburr slots and cut ends to remove sharp edges and ensure fit.
- Drill holes with jigs to maintain location accuracy if you need additional holes beyond factory slots.
- Avoid excessive heat from cutting that can change temper in some materials (particularly aluminum and certain steels).
- When welding, consider filler metal and post-weld finishing — welding may distort the profile and change corrosion protection.
If you need high-volume or precision cutting, contract with a fabricator who offers CNC punching or laser cutting for slot patterns.
Corrosion Protection and Environmental Factors
Environment dictates finish and maintenance frequency. You’ll decide based on exposure to moisture, chemicals, or salty air.
Guidelines:
- Indoor dry environments: zinc plating or powder coat is often sufficient.
- Outdoor or humid conditions: hot-dip galvanizing or stainless steel.
- High-chemical environments: 316 stainless steel or specialized coatings.
- For marine or coastal environments: avoid mild steel unless heavily protected.
Keep in mind that edges and cut ends can be corrosion-prone; specify touch-up or post-cut galvanizing where necessary.
Installation Best Practices
Clear installation practices reduce errors and improve longevity. You should:
- Assemble components on a flat, clean surface to maintain squareness.
- Tighten fasteners to specified torque values to avoid over-compression of slot nuts and distortion.
- Sequence assembly to avoid blocking access to internal nuts — position captive nuts early.
- Use threadlocker for vibrating environments, but choose the removable type if future disassembly is expected.
- Check alignment periodically during assembly to prevent cumulative errors.
Labeling parts and a step-by-step plan will make installation smoother when you have multiple modules or repetitive builds.
Safety Considerations
You’ll need to maintain safety during both fabrication and end-use. Consider these points:
- Wear protective equipment when cutting and deburring: gloves, eye protection, and hearing protection.
- Ensure edge protection on exposed slots and sharp cuts to reduce risk of cuts.
- For load-bearing frames, implement fail-safe measures (safety factors, secondary supports).
- Avoid overloading shelving and racks; clearly mark load limits to prevent misuse.
- Secure assemblies to foundations when required to prevent tipping.
A safety-first approach reduces liability and prevents damage.
Maintenance and Inspection
You’ll want a maintenance schedule to detect wear and fatigue. Recommended tasks:
- Visual inspection of fasteners and nuts for loosening every 3–6 months in active installations.
- Check for corrosion and touch up coatings where needed.
- Inspect for deformation, especially near load-bearing connections and slots.
- Replace fasteners that show corrosion or thread damage.
- Clean channels and slots from debris to maintain adjustability.
Proper maintenance extends service life and ensures safe operation.
Common Design Mistakes and How to Avoid Them
Learning common pitfalls helps you design more robust systems. Frequent errors include:
- Underestimating load or deflection: always check bending and deflection limits.
- Ignoring slot-induced weakness: reinforce or avoid placing concentrated loads near multiple adjacent slots.
- Using incorrect fastener type: ensure you have hardware that fits the slot and channel interior.
- Poor alignment during assembly: use jigs or fixtures for repeatable builds.
- Choosing wrong material/finish: match the environment, or you’ll end up with premature corrosion.
You’ll save time and money by anticipating these issues during design.
Cost Considerations and Value Engineering
You’ll balance cost, performance, and longevity. Ways to optimize cost:
- Use mild steel with effective coatings where corrosion risk is low.
- Standardize lengths and cut on-site to minimize waste.
- Buy common accessories in bulk to reduce unit cost.
- Consider alternate profiles (larger channels or paired channels) only when required by load.
Value engineering should never compromise safety; always verify structural adequacy when reducing material or finish quality.
Compatibility with Other Systems and Standards
Your project may need to interface with standard industrial components. Check:
- Metric versus imperial fastener standards.
- Compatibility with T-slot accessories if your profile resembles a common T-slot system.
- Any relevant building or machine safety standards for load-bearing or guarding applications.
Conformance to standards simplifies approvals and ensures interoperability.
Environmental and Sustainability Concerns
You’ll likely be asked about recyclability and lifecycle impacts. Consider:
- Steel and aluminum are highly recyclable; select materials and finishes that are recyclable at end-of-life.
- Powder coatings and certain galvanizing processes have environmental impacts—check supplier compliance with local regulations.
- Design for disassembly to allow reuse of profiles and hardware.
Sustainable selection can reduce long-term costs and environmental footprint.
Sourcing and Supplier Evaluation
Choosing a reliable supplier reduces risk. When evaluating suppliers, check:
- Availability of datasheets with exact slot dimensions and mechanical properties.
- Lead times and cut-to-length services.
- Quality control and certification (material traceability, surface finish spec).
- Warranty and after-sales support.
Local suppliers may reduce shipping costs for heavy items and make returns easier.
Design Examples and Case Studies
Seeing practical examples helps you apply principles. Below are two concise case scenarios to guide your thinking.
Example 1: Light-duty shelving
- Application: Storage for small parts in a workshop.
- Channel: 41×41 mild steel with 1.6 mm wall and zinc plating.
- Span: 0.9 m per shelf using two parallel channels.
- Fastening: M8 sliding nuts and steel shelf brackets.
- Notes: Use L-brackets for edge support to reduce shelf deflection.
Example 2: Guarding frame for small machine
- Application: Safety guard around a machine requiring periodic access.
- Channel: 41×41 aluminum (6063-T6) with powder coat.
- Connection: Corner brackets with captive nuts; hinge mounting using bespoke brackets.
- Notes: Verify deflection under accidental push loads and use locking fasteners for vibration.
These examples highlight material choice, fastener selection, and design checks you should perform.
Frequently Asked Questions (FAQ)
You’ll likely have recurring questions; here are answers to the most common.
Q: Can 41×41 slotted channel be used for medium-duty structural frames? A: Yes, for light- to medium-duty frames if load and span calculations show adequate strength. For heavy loads, choose larger profiles or paired channels.
Q: How do I reinforce a slotted area? A: Use backing plates, internal inserts, or avoid placing concentrated loads directly across multiple slots.
Q: Are sliding nuts reusable? A: Yes, sliding nuts can be reused provided threads and surfaces remain undamaged.
Q: Can I weld a slotted channel? A: You can, but welding may reduce adjustability and change corrosion protection—plan for post-weld finishing.
Q: What is a typical safety factor? A: Common safety factors range from 1.5 to 3 depending on criticality and load uncertainty.
Checklist Before Finalizing Your Design
You’ll feel confident if you run through a checklist before production:
- Confirm slot and external dimensions with supplier datasheet.
- Verify material and finish for environmental conditions.
- Calculate bending, shear, and deflection against expected loads.
- Select compatible fasteners and accessories.
- Plan fabrication and cutting tolerances.
- Document installation steps and torque values.
- Plan maintenance intervals and inspection points.
- Verify cost and lead time with suppliers.
Using a checklist reduces the chance of late-stage redesigns.
Troubleshooting Common On-Site Problems
When things go wrong, you’ll be prepared if you follow these remedies:
- Misaligned holes or slots: use slotted brackets or elongate holes slightly to allow alignment; ensure you do not over-weaken critical members.
- Loose fasteners in vibration applications: use locking washers, nyloc nuts, or threadlocker.
- Excessive deflection: add mid-span support, reduce span, or upgrade channel to a higher section modulus profile.
- Corrosion at cut ends: apply cold-galv or paint touch-up; consider hot-dip galvanized or stainless options next time.
These practical fixes keep projects moving and enable temporary repairs until a permanent fix is scheduled.
Final Recommendations
As you finalize your design, you’ll want to remember the key points:
- Match channel geometry and slots to the accessories you intend to use.
- Size for strength and deflection first; convenience and appearance second.
- Choose material and finish based on environment and budget.
- Use standardized hardware and confirm supplier datasheets for exact dimensions.
- Plan for assembly, maintenance, and safety from the start.
Taking these steps will help you design reliable, adjustable systems using 41×41 slotted channel and avoid costly surprises.
Conclusion
You’re now equipped with practical guidance to design, specify, and install 41×41 slotted channel systems. If you follow the structural checks, match components carefully, and adopt good fabrication and installation practices, you’ll get a modular and durable assembly suited to a wide range of industrial and commercial uses.
If you’d like, tell me details about your specific application (loads, spans, environment), and I can help run the calculations or recommend materials and fasteners tailored to your project.